Historic Everyday Eats – Ginger Cakes

Standard

This week in Historic Everyday Eats, I went back into my comfort zone and made another dessert. (What can I say? It’s what I’m best at!) After doing a little digging around, I found a recipe that specifically said it was for “cold weather,” so I figured, why not (since snowstorms have been THE hot topic this week)?

The recipe comes from a cookbook titled The Universal Receipt Book; Being a Compendious Repository of Practical Information in Cookery, Preserving, Pickling, Distilling, and All the Branches of Domestic Economy. To Which is Added Some Advice to Farmers. (1818) by one Miss Priscilla Homespun. With a title like that, authored by someone whose last name is literally “homespun,” you just can’t go wrong!

Universal Receipt Book 1818

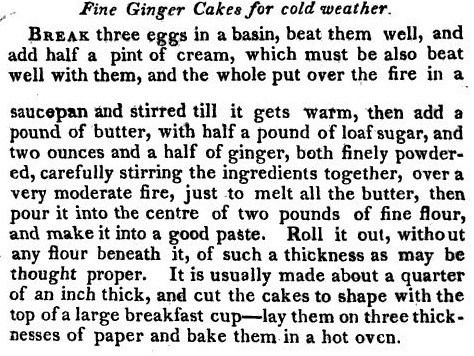
This is another book with a lot of great recipes, so I hope to use it several times in the future. The recipe I chose from it for this week is for a nice little dessert called “Ginger Cakes.” The recipe for “Fine Ginger Cakes for cold weather” reads as follows:

Ginger Cakes

“Break three eggs in a basin, beat them well, and add half a pint of cream, which must be also beat well with them, and the whole put over the fire in a saucepan and stirred till it gets warm, then add a pound of butter, with half a pound of loaf sugar, and two ounces and a half of ginger, both finely powdered, carefully stirring the ingredients together, over a very moderate fire, just to melt all the butter, then pour it into the centre of two pounds of fine flour, and make it into a good paste. Roll it out, without any flour beneath it, of such a thickness as may be thought proper. It is usually made about a quarter of an inch thick, and cut the cakes to shape with the top of a large breakfast cup–lay them on three thicknesses of paper and bake them in a hot oven.”

I cut this recipe in half so that I wouldn’t have sixty “cakes” laying around my apartment, so let’s see how that went for me!

IMG_9212

Cutting the recipe in half (essentially), the ingredients were: 2 eggs, 1/2 cup heavy whipping cream, 2 sticks butter, 3/4 cup sugar, 2 tablespoons ginger, 3 1/3 cups flour. (Please excuse the salt underneath the eggs in this photo–I was in the process of making a crock pot dish while also making this one and completely didn’t notice it!)

IMG_9213

Full confession: I had to repeat the first step of this recipe twice! It involves slowly heating eggs beaten with cream, and I heated it WAY too quickly the first time and ended up with creamy scrambled eggs [not what the recipe calls for!]. So, the second time around, I beat two eggs with half a cup of cream in a bowl, then added that to a cold saucepan. I then slowly heated the pan and the mixture over LOW heat. This only took a few minutes.
IMG_9215

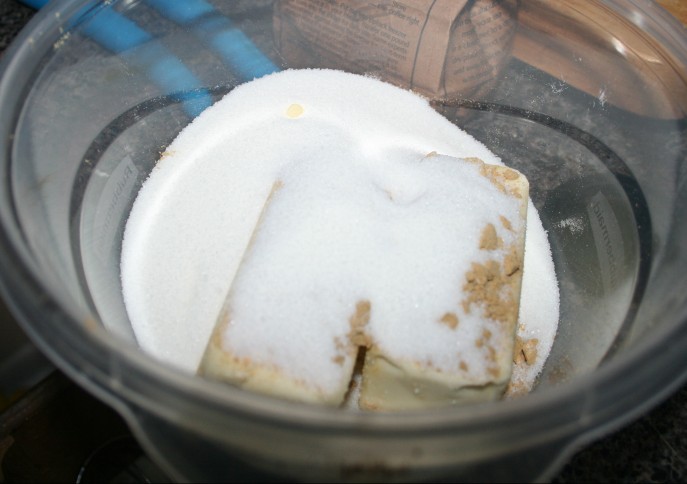
I then added the 3/4 cup of sugar, 2 tablespoons of ginger, and 2 sticks of butter to the egg and cream mixture all at once.
IMG_9216

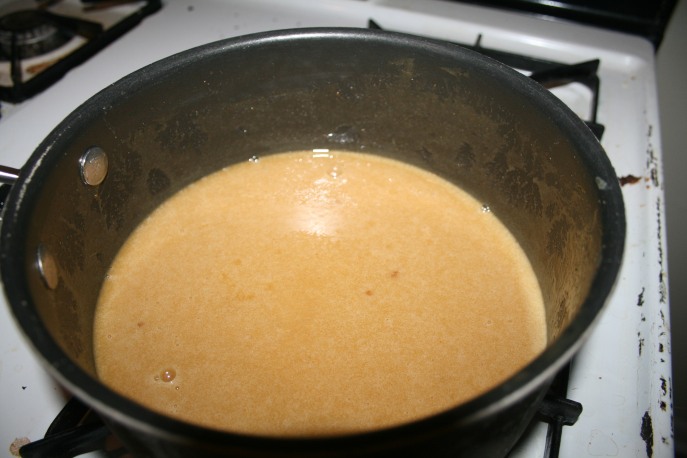
I mixed in the ginger, sugar, and butter until everything had melted and/or thoroughly combined, still over low heat.

IMG_9217

I then poured the egg, cream, butter, sugar, and ginger mixture over 3 1/3 cups of flour.

IMG_9218

I mixed the ingredients together until I came out with a dough that looked like this.

IMG_9219

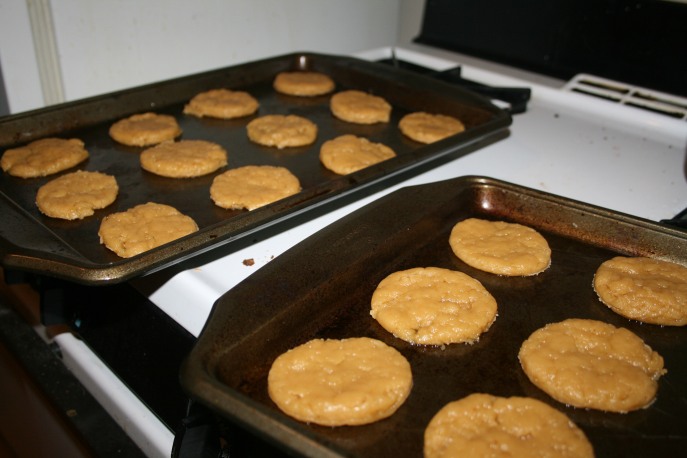
I then rolled out the dough to about a quarter of an inch thick without any additional flour underneath it or on the rolling pin as the recipe states. Trust me, it does not need the extra flour. This dough is kind of “greasy” feeling and not sticky in the least, so it did not stick to the surface of my counter at all. I then used a “breakfast cup” [aka just a regular cup] to cut out circles.
IMG_9220

My “cakes” went into a 400 degree oven on cookie sheets, not “three thicknesses of paper,” because I did not want to burn my entire building down. 😉

IMG_9221

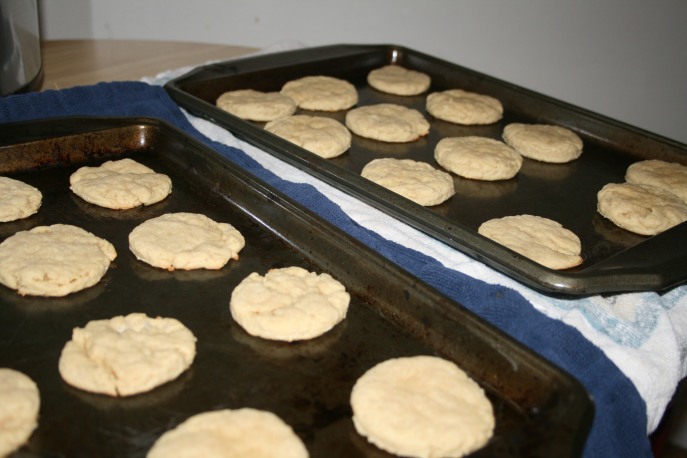
After baking 8 minutes, the “cakes” were done!

IMG_9222

To be honest, these are way more like cookies than cakes, but either way, they taste great! The ginger adds a nice spiciness [flavor, not level of heat] to the dough, and the final product is dense and aromatic–perfect for “cold weather”!

If you’re having some cold weather, give these ginger cakes a shot! They’re easy, fast, and very tasty! Plus, I bet you already have almost all of these ingredients in your kitchen already, so it’s really a no-brainer. 🙂

Sleepy Hollow Season 2, Episode 14 Recap

Standard

Last night’s episode of Sleepy Hollow, “Kali Yuga,” was a much-needed breath of fresh air for this series. While the premise of the episode focused on Nick Hawley, a good looking but somewhat (well, very) useless character, the core of the show was all about Ichabod, Abbie, and making repairs to their relationship. It didn’t hurt that these repairs featured singing karaoke, either!

“Kali Yuga” was an episode that really let all of the characters shine: we got to see Jenny Mills being a total badass once again; we saw Ichabod glowing with pride over Abbie’s singing, and we finally were able to see him be WRONG about a hunch (about time!); we saw Abbie let down her guard for her partner while still getting the job done; we saw Hawley go away finally; we saw Irving struggle with his new, undead yet “exonerated” life status; we saw minimal, yet very, very shady Katrina (which is how she is best utilized until she can be done away with permanently).

This episode definitely takes season 2 into a new and much better direction. Hopefully the episodes will continue to improve from this point so that we will get a season 3.

ichabbie duet

THIS is why I watch Sleepy Hollow.


Historic Everyday Eats – Beef-Steak Pie

Standard

Happy Wednesday, everyone! This week in Historic Everyday Eats, I decided to go with a historic recipe that was NOT a dessert–I know, it’s shocking. I’ve only made a “savory” dish one other time in my weeks of following historic recipes, so I figured it was about time to do it again. 😉

I found a recipe in the same cookbook that I used last week, (Seventy-Five Receipts for Pastry, Cakes, and Sweetmeats, 1832) and I didn’t break anything this time while making it! (Yay!) The non-dessert I chose out of this book was Beef-Steak Pie.

The recipe for “Beef-Steak Pie” reads as follows:

Beef-Steak Pie


“Butter a deep dish, and spread a sheet of paste all over the bottom, sides, and edge.

Cut away from your beef-steak all the bone,fat, gristle, and skin. Cut the lean in small thin pieces, about as large, generally, as the palm of your hand. Beat the meat well with the rolling-pin, to make it juicy and tender. If you put in the fat, it will make the gravy too greasy and strong, as it cannot be skimmed.

Put a layer of meat over the bottom-crust of your dish, and season it to your taste, with pepper, salt, and, if you choose, a little nutmeg. A small quantity of mushroom ketchup is an improvement; so, also, is a little minced onion.

Have ready some cold boiled potatoes sliced thin. Spread over themeat, a layer of potatoes, and a small piece of butter; then another layer of meat, seasoned, and then a layer of potatoes, and so on till the dish is full and heaped up in the middle, having a layer of meaton the top. Pour in a little water.

Cover the pie with a sheet of paste, and trim the edges. Notch it handsomely with a knife; and, if you choose, make a tulip of paste,and stick it in the middle of the lid, and lay leaves of paste round it.

Fresh oysters will greatly improve a beef-steak pie. So also will mushrooms.

Any meat pie may be made in a similar manner.”

(In case you’re wondering, mushroom ketchup is exactly what it sounds like–ketchup made from mushrooms instead of tomatoes. I could not find this in the store, but I still used mushrooms in the pie!)

Let’s see how I did with this savory dish!

IMG_9193

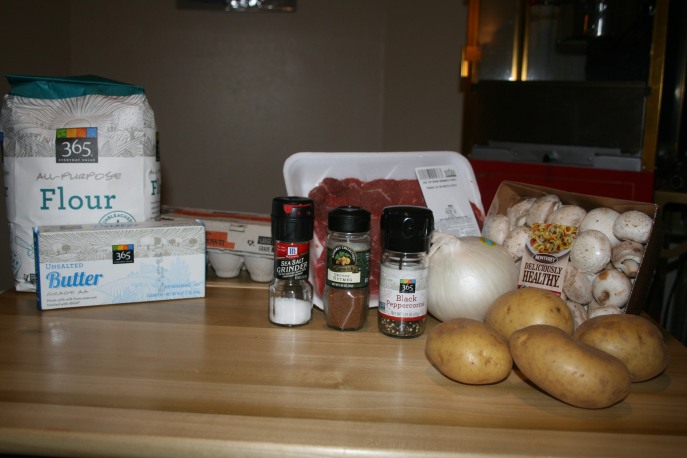
The ingredients: 2 cups flour, 2 beaten eggs, 3 sticks butter (for the crust). 1 pound beef (I used sandwich steaks), 1/2 cup onion, 1/2 cup mushrooms, 1 pound potatoes, and salt, pepper, and nutmeg to taste.

IMG_9194

First, I made the dough for my pie crusts using the same method as I did for pumpkin pie and apple pie. I mixed the 3 sticks of butter (in large, cold chunks) into the 2 cups of flour with the 2 beaten eggs and a few tablespoons of water. I then let the dough sit, covered in the refrigerator for about thirty minutes while I prepared the other ingredients.

IMG_9195

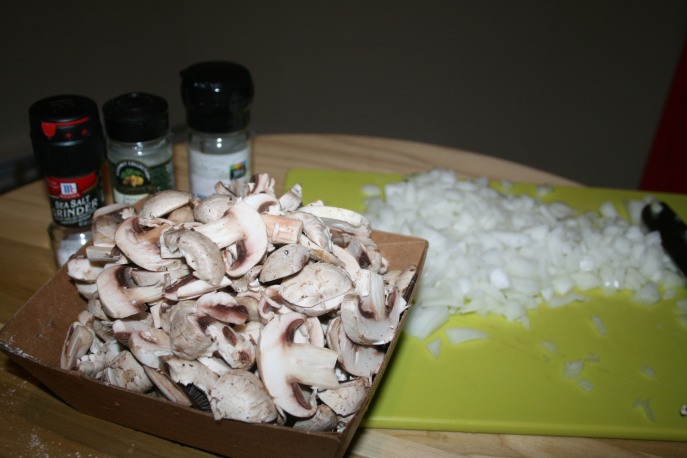
I then sliced and diced my onion and mushrooms while I boiled the potatoes. (I cut up WAY too many mushrooms and onion, but that’s okay. I just used the leftovers as a side!)

IMG_9196

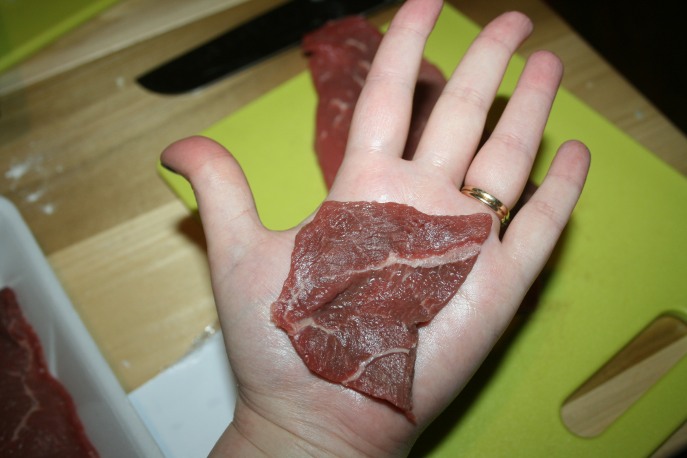
Since I got packaged meat from the grocery store, I didn’t actually have to cut away the fat and bone , and since I got “sandwich steaks,” the pieces were already cut thin. (Thanking my lucky stars for grocery stores!) I cut the pieces roughly into the size of my palm (about 2ish inches), as the recipe states.

IMG_9200

I then rolled out my pie dough and laid it into a disposable pie pan.

IMG_9201

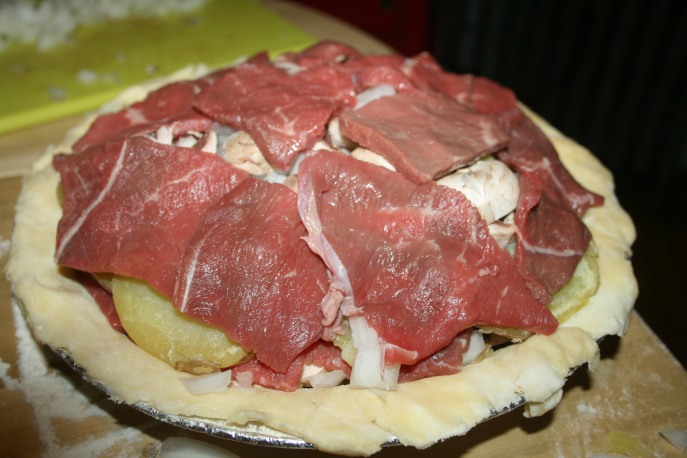
Next, I “beat” the chunks of meat with my rolling pin [I really just rolled them with the rolling pin because that was easier], and I began to layer my pie. I put down a layer of meat, followed by a sprinkling of pepper, salt, and nutmeg, followed by potatoes [boiled and cut thin], onions, and mushrooms. [Shock of all shocks–I forgot to put extra butter in the layers. Oh well. It still turned out well.]

IMG_9203

I continued the layering until I had my final layer of beef “heaped” on top. [I had three layers of beef total.] I then poured on about two tablespoons of water.

IMG_9204

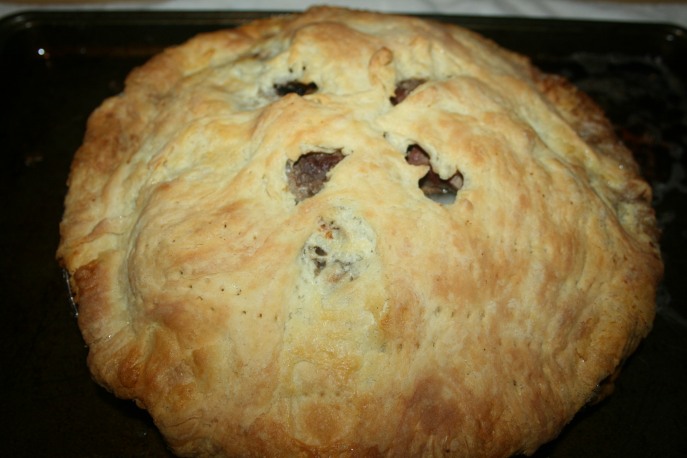
I then topped the pie with a top layer of crust [or “paste”] and tried my best to cut fancy holes in it, but I did not even attempt to make a tulip out of leftover dough and lay pretty leaves all around the top because I am just not that talented. 😉 I poked more holes in the crust with a fork to release as much steam as possible.

IMG_9205

I baked the pie in a 375 degree oven for 1 hour [on a cookie sheet in case of spill over]. This was a complete guess, of course, because there are absolutely no baking instructions with this recipe! The crust came out golden brown, and the filling was cooked perfectly.

IMG_9206

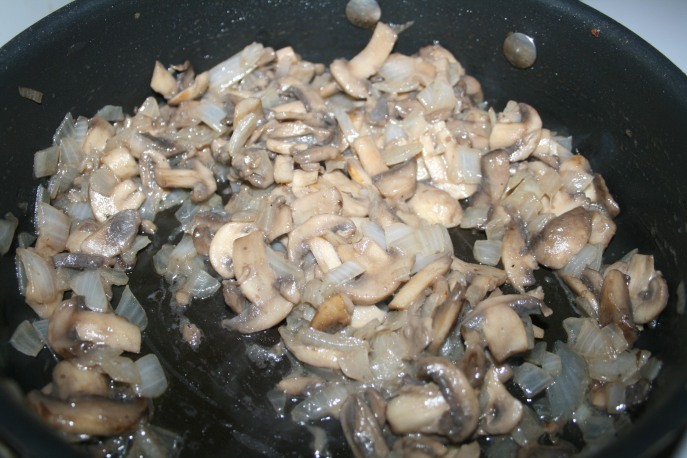
While the pie was baking, I made a side of sauteed mushrooms and onions since I purchased way too many. 🙂

IMG_9210

I was very hungry when I made this pie, so I cut into it after about 10 minutes of letting it sit after it came out of the oven. Because of that, it kind of fell apart when I took it out of the pan, but it was still delicious! The pepper and nutmeg go really well together and give the beef a distinct flavor. The onions, mushrooms, and potatoes inside the pie were a great combination, and the pie crust was flaky and buttery.

IMG_9211

When it was time to get seconds, the pie had set for about 40 minutes, and it stayed together much better out of the pan [even the bottom crust stayed in place].

Beef-steak pie was definitely a winner in my house (especially with my dog Cosmo who tried to steal it off of our plates several times and finally succeeded in stealing some off of the counter while we weren’t looking). This recipe is pretty simple, and it is a nice hearty meal to have in the middle of winter!

I may have to give more savory recipes a go in the future, even though my heart does remain most strongly attached to desserts!

Sleepy Hollow Season 2, Episode 13 Recap

Standard

The most recent episode of Sleepy Hollow, “Pittura Infamante,” was a perfect example of what I do not want to see in a TV show. The leading actress (Nicole Beharie) was given a B-plot, the A-plot was a dragging, boring mess, and the show’s worst character (Katrina) was meant to look like a hero but once again came out as a dimwit in the end. (Honestly, what the show’s writers have done to her character is a complete travesty. The only thing that could partially redeem the situation is if she becomes evil, which I hope for EVERY. DAY.)

What I did like about this episode were the interactions between Abbie, Jenny, Frank Irving, and Cynthia Irving. This B-plot should have been the A-plot of the episode–it was much more interesting and much better acted than the mess that was Ichabod and Katrina on a “date” that turned into a murder mystery. Of course, at the end of the episode, Ichabod and Katrina are completely defenseless against their foe, and Abbie comes in at the last minute and saves the day. This show would be nothing and go nowhere without Abbie Mills.

This show is in trouble. FOX hasn’t decided if it’s going to renew Sleepy Hollow for a third season, and the ratings continue to plummet. If this show has a chance, the writers and producers have to get back to what works–the relationship between Ichabod and Abbie. Hopefully by the end of this season, we can begin to see a new direction in the show, but based on last night’s episode, I just don’t know what will happen.

Abbie done with it

Historic Everyday Eats – Crullers

Standard

Over the course of the last month, I read a book titled A Confederacy of Dunces by John Kennedy Toole for my book club. It focuses on the story of a man named Ignatius Reilly, an insane (and insanely funny) character who lives in New Orleans. If you haven’t read this book, I highly recommend it.

Our book club met this past Sunday to discuss this book, and I wanted to make a historic recipe that sort of went along with the theme of the book. Since Ignatius loved sweets and was deeply embedded in the French-American culture of New Orleans, I decided to try out a recipe for crullers (originally a French dessert) that I found in a U.S. cookbook from 1832.

That cookbook is called Seventy-Five Receipts for Pastry, Cakes, and Sweetmeats

1832 Boston cookbook


This lovely book by “Miss Leslie” contained a lot of very interesting recipes, so I might be coming back to it for more in the future! The recipe for this week, “Crullers,” reads as follows:

Crullers

“Half a pound of butter.
Three quarters of a pound of powdered white sugar.
Six eggs, or seven if they are small.
Two pounds of flour, sifted.
A grated nutmeg.
A tea-spoonful of powdered cinnamon.
A table-spoonful of rose-water.

Cut the butter into the flour, add the sugar and spice, and mix them well together.

Beat the eggs, and pour them into the pan of flour, &c. Add the rose water, and mix the whole into a dough. If the eggs and rose-water are not found sufficient to wet it, add a very little cold water. Mix the dough very well with a knife.

Spread some flour on your paste-board, take the dough out of the pan, and knead it very well. Cut it into small pieces, and knead each separately. Put all the pieces together, and knead the whole in one lump. Roll it out into a large square sheet, about half an inch thick. Take a jagging-iron, or, if you have not one, a sharp knife; run it along the sheet, and cut the dough into long narrow slips. Twist them up in various forms. Have ready an iron pan with melted lard. Lay the crullers lightly in it, and fry them of a light brown, turning them with a knife and fork, so as not to break them, and taking care that both sides are equally done.

When sufficiently fried, spread them on a large dish to cool, and grate loaf-sugar over them.

Crullers may be made in a plainer way, with the best brown sugar,(rolled very fine,) and without spice or rose-water.

They can be fried, or rather boiled, in a deep iron pot. They should be done in a large quantity of lard, and taken out with a skimmer that has holes in it, and held on the skimmer till the lard drains from them. If for family use, they can be made an inch thick.”

Before we get started on the process of making this dessert, I will let you know that I encountered a series of mishaps while making them, but the crullers still turned out just fine. Let’s see what happened!

IMG_9177

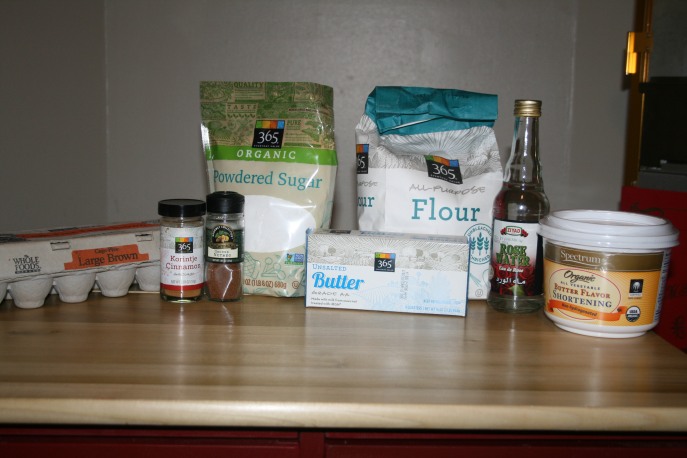
The ingredients: 2 sticks butter, 2 3/4 cups powdered sugar, 3 2/3 cups flour, 2 teaspoons nutmeg, 1 teaspoon cinnamon, 6 large eggs, 1 tablespoon of rosewater, and about half of a 24 ounce container of vegetable shortening (for frying).

IMG_9178

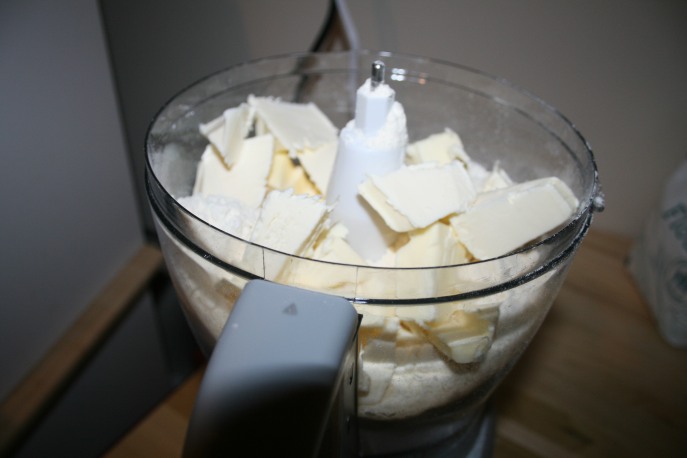
Since the recipe repeatedly called for “cutting” the dough and using a knife to combine the ingredients, I decided to pull out my food processor, which has a 10 cup capacity, to mix the ingredients. I first cut up the 2 sticks of butter and “cut” those into the flour.

IMG_9179

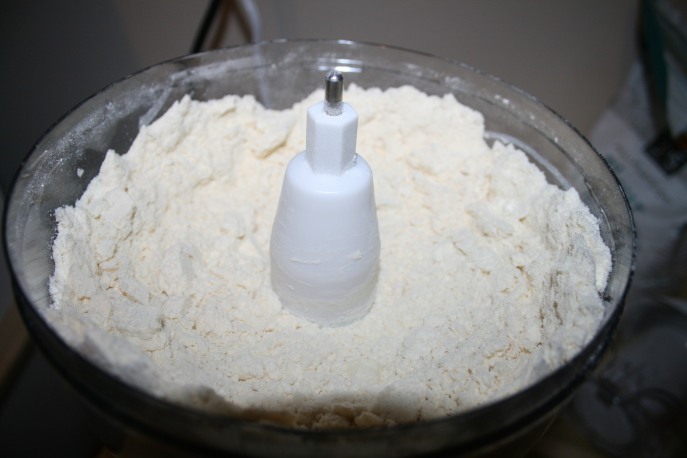
The butter became very small clumps within the flour after about a minute of processing.

IMG_9180

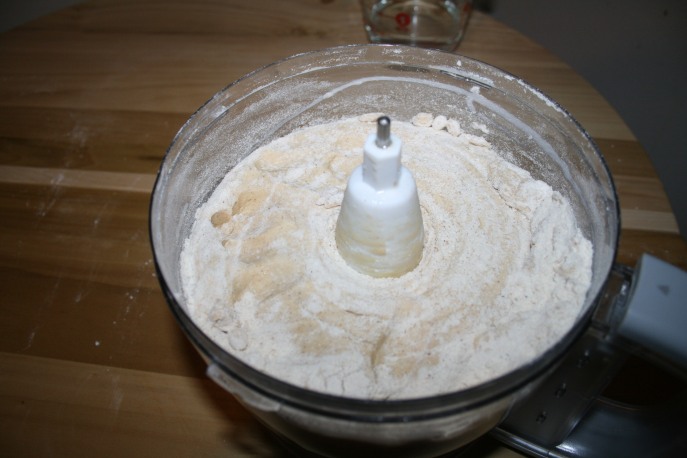
I then mixed in the powdered sugar, cinnamon, and nutmeg (1 whole nutmeg is equal to about 2 teaspoons ground).

IMG_9181

I then added the rosewater and 6 beaten eggs to the mixture.

IMG_9182

The dough came together pretty nicely in the food processor, until the processor shut off and started smoking. (Note to self: don’t make such a thick dough in food processors ever again.)

IMG_9183

When the dough first came out of the now-broken food processor, it was entirely too sticky. I ended up having to add about another half a cup of flour to the dough through kneading to get it to a point where it wouldn’t stick to my hands and everything else. Also, when pulling out the dough, I nicked one of my fingers on the blade and am now sporting a lovely band aid because of it. No worries, though–no blood went into this dough!

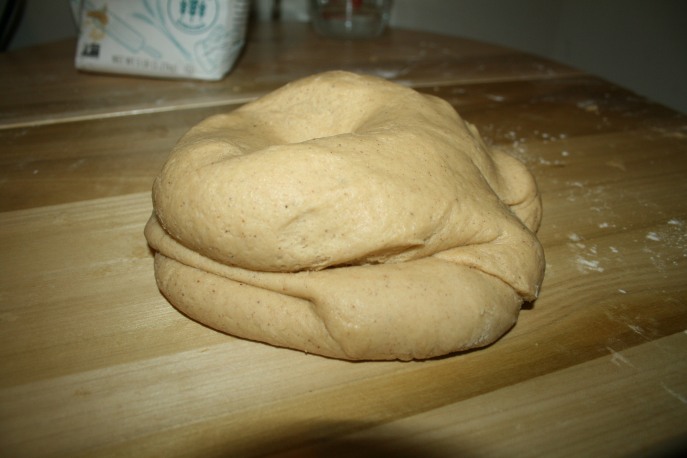
IMG_9185

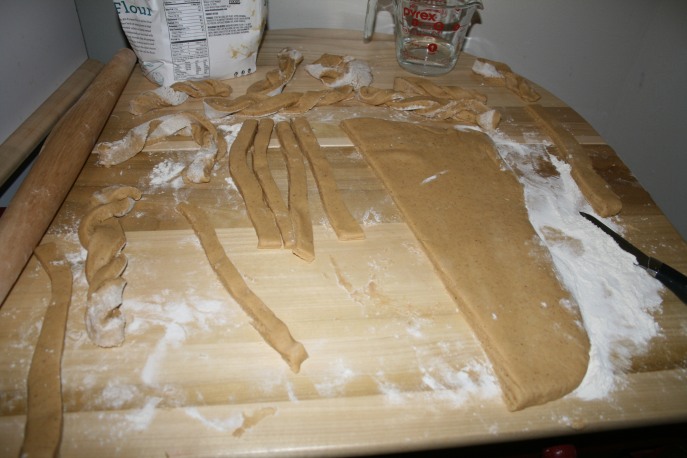
After the dough was no longer a sticky mess, I rolled it into as good of a “square” as I could.

IMG_9186

I then cut the dough into long narrow strips and twisted the pieces into different shapes.

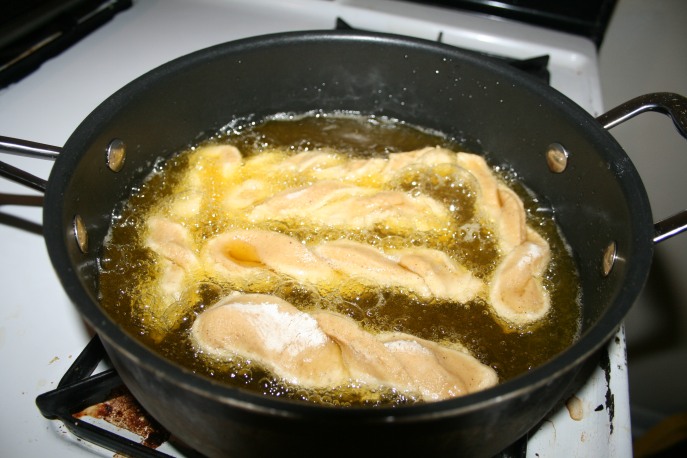
IMG_9188

I heated approximately 12 ounces of shortening over medium-high heat and fried the crullers for 2 minutes on each side. I used a small amount of shortening to do a sort of pan fry rather than a deep fry, but in the future, I would definitely say that deep frying would be the better option. More on that in a moment. (Note: I used shortening instead of lard in this recipe to fry the dough because I have some Jewish friends who were coming to book club and wanted to make this dessert Kosher. If you want to use lard, go for it!)

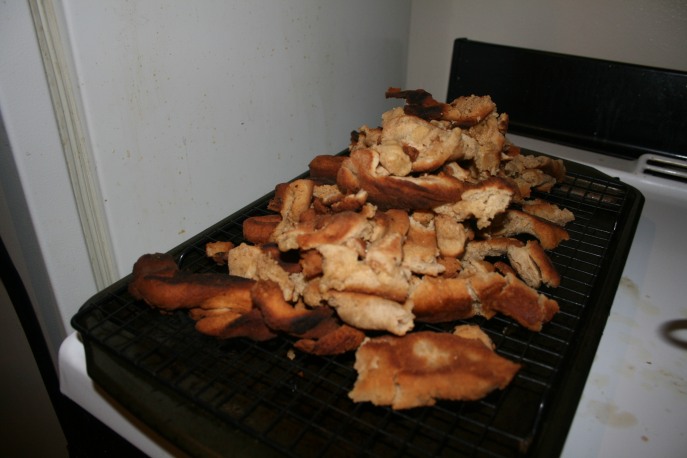
IMG_9189

My first couple of batches of crullers turned out golden brown and delicious! However, many of them broke apart when I flipped them in the pan, which is one reason why I think deep frying would be better next time. However, they still tasted delicious even though some of them were broken! I topped them with more powdered sugar, and they looked as good as they tasted.

IMG_9190

Did you notice how I said, “the first couple of batches” turned out great? That’s because the last couple of batches didn’t. I wasn’t able to control the heat as well for subsequent batches, and they either turned out charred or still doughy. Yet another reason why deep frying is definitely the option to go with next time–you can fit more pieces in, the whole piece fries without being flipped, and it is easier to keep the temperature regulated. Live and learn, I guess. 😉

When I arrived at the book club meeting, my friends immediately took an interest in the crullers. The rosewater in these adds another layer of flavor that many of us don’t taste that often today, so everyone who tried these wanted to know how I made them and what was in them.

Overall, the (first couples of batches of) crullers were a great success, and even though I may have injured myself and lost a kitchen appliance, I’ll definitely make these again in the future!

Sleepy Hollow Season 2, Episode 12 Recap

Standard

We’re back from the winter hiatus on Sleepy Hollow, which means we’re also back in the middle of some Crane family drama and Katrina bs (oh, joy). Tonight’s episode, “Paradise Lost,” wasn’t as bad as the worst of the season (i.e., Deliverance), but it also wasn’t great for many reasons.

Reason one is the fact that Ichabod absolutely cannot side with his partner and fellow Witness whenever his shady wife is around. (Freeing the Headless Horseman?! Seriously…WTF?!) However, Abbie did go off on Ichabod and Katrina again this episode, and that is always worth watching. Reason two as to why this episode wasn’t great was the return of a jealous Nick Hawley. Sorry, but no one gets to lay claim to Jenny Mills–she is a goddess and belongs to no one, especially someone like him. Reason three as to why this episode really wasn’t great was the fact that Abbie came to the defense of Katrina and even apologized for doubting her at the end. Abbie had every right to doubt the witch, even if the angel Orion wasn’t 100% on the side of good. Mark my words: Katrina will end up being evil. She absolutely has to turn out that way. Nothing else would explain her shifty behavior.

In all, this episode didn’t make me want to pull out my hair, punch the TV, or just cry from how sad and boring it was, so it’s an improvement over some of season 2. It’s still not on the level of season 1 of Sleepy Hollow, but I am willing to wait it out and continue watching in the meantime.

ichabbie 2.12

If there’s ever any doubt as to why I keep watching, it’s this. #ichabbie


Historic Everyday Eats – Duchess Loaves

Standard

Today is a special day, my friends. It is Downton Day! That’s right, Downton Abbey, season 5 comes to U.S. television screens this very evening! I love, love, love this show (the romances, the drama, the scandal, the costumes), and since it is set in England in the early 1900s, I decided to make my first “Historic Everyday Eats” post of the new year come from an English cookbook written in 1908. That book is Sweets and Supper Dishes A La Mode by Harriet Ann De Salis.

Sweet and Savory Cookbook 1908

Any cookbook that starts off with a quote by Shakespeare is fine by me!

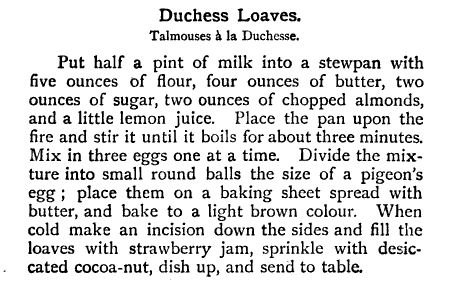
After perusing the pages of this book, I came across a recipe that I thought would be absolutely perfect for Downton Day — Duchess Loaves (or should I call them Dowager Countess Loaves?). These are sweet biscuit-like “loaves” filled with jelly, aka a perfect little finger food for throwing a multimillion-dollar party or for sitting on your couch watching other people do that.

The recipe for “Duchess Loaves” reads:

Duchess Loaves

“Put half a pint of milk into a stewpan with five ounces of flour, four ounces of butter, two ounces of sugar, two ounces of chopped almonds, and a little lemon juice. Place the pan upon the fire and stir it until it boils for about three minutes. Mix in three eggs one at a time. Divide the mixture into small round balls the size of a pigeon’s egg; place them on a baking sheet spread with butter, and bake to a light brown colour. When cold make an incision down the sides and fill the loaves with strawberry jam, sprinkle with desiccated cocoa-nut, dish up, and send to table.”

(Side note: “Desiccated” coconut is coconut meat that has been shredded then dried to remove as much moisture as possible. So it is okay to get coconut that just says “dried” on the package, but don’t get frozen coconut.)

Let’s see how my “loaves” turned out!

IMG_9135

The ingredients and measurements: 1 cup whole milk, 2/3 cup flour, 1 stick butter, 1/4 cup sugar, 1/4 cup chopped almonds, juice from 1/2 a lemon, 3 eggs, strawberry jam, and dried coconut.


IMG_9136

I first chopped the almonds into very small pieces. I bought slivered almonds at the store for the sole purpose that they were cheaper than the whole almonds, but as long as they are chopped when they go into the mixture, you can start with whatever you like!

IMG_9137

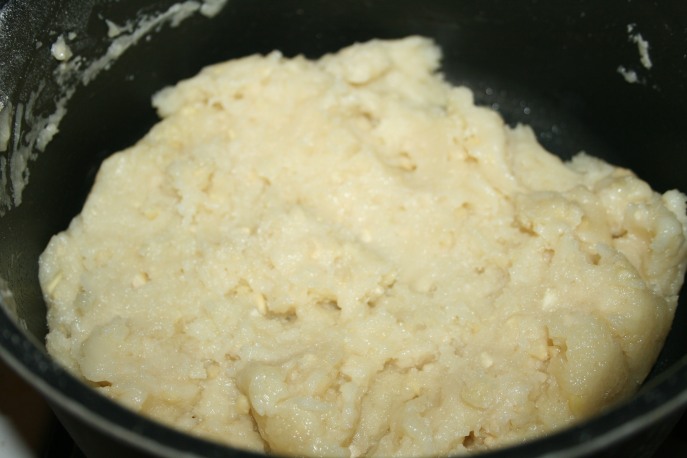
I then mixed together the milk, butter, flour, sugar, almonds, and lemon in a pan on medium-high heat. This became a dough almost immediately, so I do not understand the instruction for stirring until it boils, but I did stir it for about three minutes on the stove top.

IMG_9138

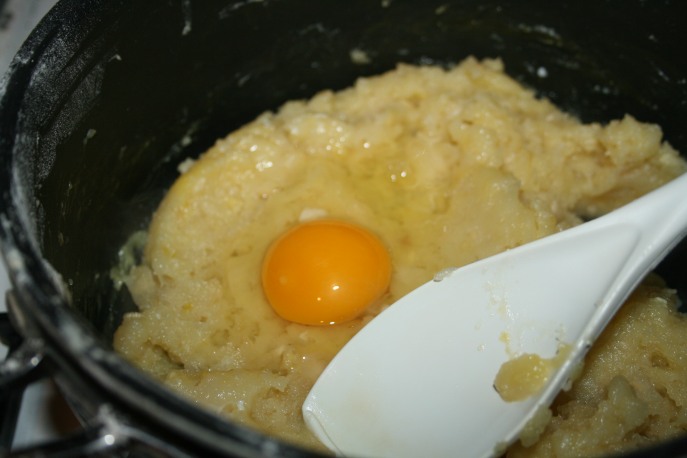
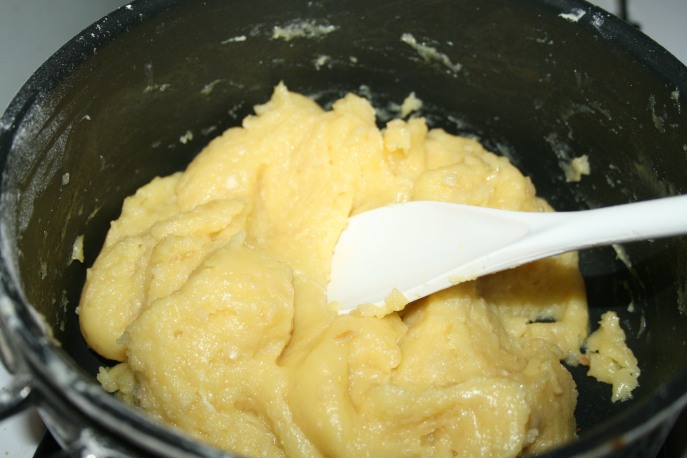
I then removed the mixture from the heat and mixed in the three eggs one at a time. I made sure to not let the eggs touch the bottom of the pan so they would not cook (aka scramble) immediately on the hot surface.

IMG_9139

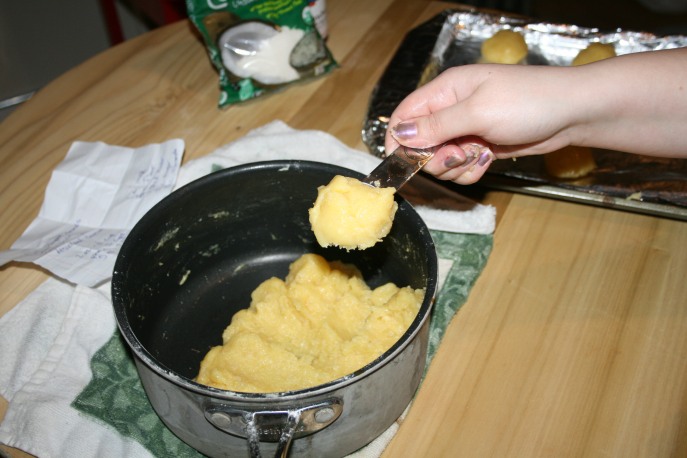
The end result was a sticky but solid dough with a very wet texture.

IMG_9140

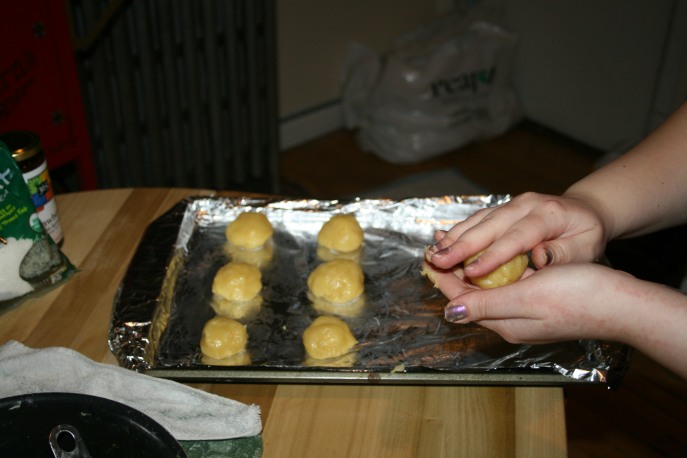
Since I don’t know what exactly the author meant by balls the size of a “pigeon’s egg,” I used my tablespoon measuring spoon to scoop out somewhat-uniform dough balls. (It’s never completely uniform when I’m involved, however!)

IMG_9141

I then evened out the dough balls by hand and placed them on a baking sheet lined with aluminum foil coated in butter.

IMG_9143

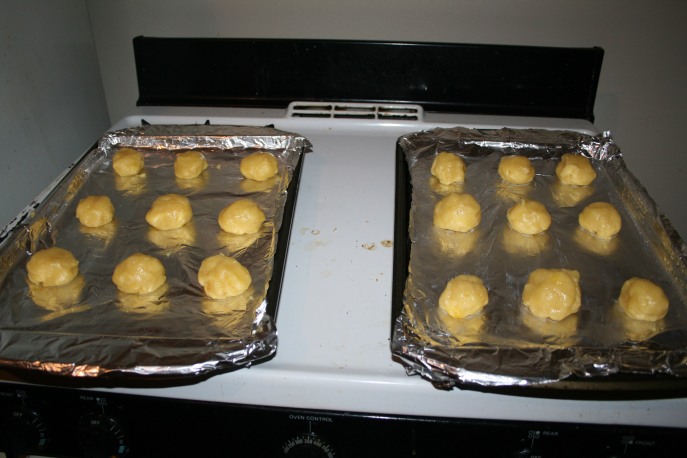
I ended up needing two sheet pans for the loaves, but this is still a more acceptable amount of dough than some of the other historic recipes I’ve made. 😉 Since there were absolutely no temperature or time specifications for baking these in the recipe, I baked them in a 350 degree oven for about 25 minutes. Check them often while baking if you decide to make these, but I believe anywhere from 20-25 minutes will get these done!

IMG_9144

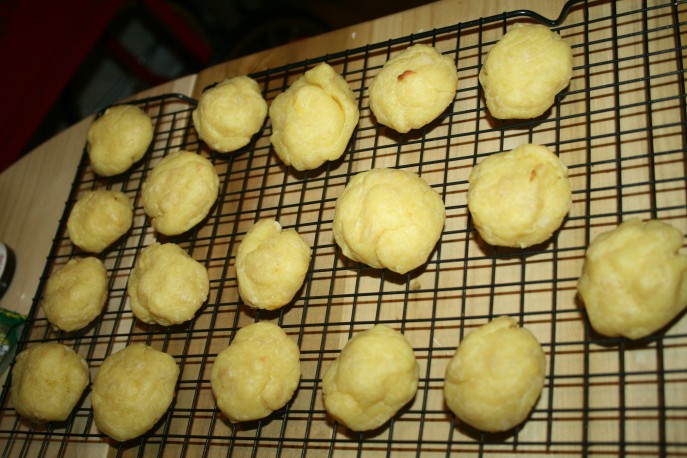
After baking, I let the loaves cool on a wire rack for about an hour.

IMG_9145

After the loaves thoroughly cooled, I cut them in half, spread them with strawberry jelly, topped the jelly with dried coconut, and topped them with the other half of the loaves.

IMG_9146

To finish them, I sprinkled more dried coconut on the tops of the loaves. The end result is a little snack that is sweet, but not overly so. The loaves are dense and intensely nutty in flavor. Certainly this is a dessert that the entire Crawley family would have enjoyed!

This recipe for Duchess Loaves turned out better than I could have imagined, and I can only hope that they have lived up to the standards of Mrs. Patmore.

Mrs. Patmore

I am looking forward to eating the rest of my Duchess Loaves during the season 5 premiere of Downton Abbey tonight, and I hope you all will join me on the crazy ride that this season will surely prove to be!


Historic Holiday Eats Recap

Standard

The holidays are officially over, so it’s time for “Historic Holiday Eats” to come to an end. It has truly been so much fun (even if it was difficult from time to time) to take the recipes from Amelia Simmons’ 1798 cookbook, American Cookery, and recreate them in my own kitchen. In fact, it was so much fun that I’m going to keep doing it. (You didn’t think I could actually stop now, did you?!)

Julia Child Quote

When a historic recipe overwhelms me, I just look for inspiration from Julia Child. 😉

From now on, my food posts will be called “Historic Everyday Eats,” and I will be using several different historic cookbooks that I have been able to find transcribed online (links to all of them will be included, of course). Before venturing into this new series of historic recipes, I want to take a look back at the ones that got me started.

In order of my most to least favorite (though I enjoyed them all), here are my nine historic holiday recipes:

1. Christmas Cookies 

2. Apple Pie

3. Whipped Syllabub

4. Winter Squash Pudding

5. Syllabub “from the Cow” 

6. Pumpkin (Pie)

7. A Stuffed Bird

8. Gingerbread

9. Indian Pudding 

I look forward to creating even more delicious historic recipes in the new year, and I hope you’re looking forward to it as well!