The Dog Days of Winter: A Follow Up

Standard

Well, today is officially the last day of winter, everybody! (According to the calendar, at least…) You know what that means–the Baud Squad has officially survived our first winter in the Windy City! Back in November, I wrote about how we had prepared our pups for the upcoming winter months. Today I’m going to tell you how that worked out for us.

We took several measures to make sure Cosmo and Missy would be as comfortable as possible this winter. We bought dog jackets to keep the pups warm in the subzero temperatures. We bought a balm called Musher’s Secret to keep the pads of their paws protected from salt and ice. We tried to ensure that they would have as easy of a time in the cold as possible, but nothing could actually prepare us for the first day it hit negative temperatures with ice and snow everywhere. The dogs were confused to say the least, and they definitely didn’t like standing on the ice (and the road salt people used to melt said ice) for extended periods of time. No matter how many layers of Musher’s Secret I put on their feet, my pups just wouldn’t stay outside for more than five minutes at a time on the coldest days. I could tell they weren’t happy about that, so I caved and bought them booties. My dogs HATE people touching their feet, so I knew this would be a problem.

Enter Pawz booties.

close-up-dog-in-large

These little rubber boots were a lifesaver this winter for us. They look just like balloons, and they slip right over your dog’s foot, creating a barrier between their pads and the ice, yet allowing the dog to still feel the ground (thus no prolonged walking-horse-style steps or attempts to remove the booties). It took some effort to get these on our dogs (especially Cosmo, who freaks out at the drop of a hat), but they were SO WORTH IT! Our dogs were able to stay outside for much longer periods of time, and they really didn’t mind the booties once they were on–they just didn’t enjoy the process of putting them on their feet!

IMG_9293

Cosmo says, “I guess I can tolerate this.”

Pawz come in several sizes, from tiny to extra large, so you can find any size that works for your dogs on their helpful size chart. Luckily, both of our dogs fell within the “medium” range, so we bought one $14 package for both of them (there are 12 boots in a package).

Missy Baud

Missy says, “I guess they’re not so bad.”

Both of our pups were so much happier and excited to go outside once we started using the booties, so I am eternally grateful for them! They don’t slip off easily, and they look completely adorable. The only downside to the boots is that they can tear, but we had enough replacements in the package to make it through all the weeks of extreme cold!

As for the other equipment we purchased for the winter–the jackets came in handy on several days. If it was below 10 degrees, Cosmo and Missy had their jackets on, whether they wanted to or not! And while the Musher’s Secret wasn’t quite enough to protect their feet, it actually was very helpful for keeping their pads moisturized when they got dry. I even used it on Missy’s nose this winter too. (She loved shoving her head in the snow, and the snow that stuck to her nose would make it dry. Musher’s Secret helped with that problem!)

Both Missy and Cosmo had fun this winter, even if they didn’t always enjoy the temperature outside! Being prepared went a long way toward making the winter enjoyable for everybody, but I think I can speak for our entire crew when I say that we’re glad spring is here!

IMG_8634

The Baud dogs are ready for warmer days ahead in the Windy City!

Historic Everyday Eats – Colcannon

Standard

Top of the morning to you, folks! This week in historic everyday eats, I decided to make a traditional Irish dish in honor of St. Patrick’s Day! After some digging around, I found a dish so Irish that it practically jumped off of the page and demanded that I make it. I found it in a cookbook published in 1883 titled Cassell’s Dictionary of Cookery, which is actually a British publication (but it contains Irish recipes as well).

Cassell's

The recipe I decided to make for St. Paddy’s was none other than colcannon, a very simple yet hearty dish that uses some key ingredients that remind us all of Ireland–cabbage and potatoes. The recipe for “Colcannon” reads as follows:

Colcannon


“Boil separately equal weights of young cabbage, savoy, or spinach, and potatoes. Chop the greens and mash the potatoes, and mix them well together with a little pepper and salt, and one ounce of butter to one pound of the mixed vegetables. Heat the mixture over the fire for a few minutes, stirring it all the time; then press it into a hot, well-buttered mould. Turn out and serve. Or, press it after mixing into a well-buttered mould, and put it into the oven half an hour. Turn out and serve. Cold vegetables may be warmed up in this way. Probable cost, 6d. for a pint mould. Sufficient for three or four persons.”

Full disclosure: I love every single ingredient in this recipe, so I was really excited about making it! Let’s see how it turned out:

IMG_9384

The ingredients: three russet potatoes, 3/4 of a head of cabbage, 3/4 of a 6 oz. bag of baby spinach, 2 teaspooons salt, 1 teaspoon pepper, 1/2 stick of butter.

IMG_9385

I first peeled and chopped the three potatoes and put them in a pot to boil for about 30 minutes.

IMG_9386

I then chopped the head of cabbage (yes, I chopped it before boiling even though the recipe says to chop it afterward–it’s just easier this way!), and I boiled it with the baby spinach for about 18 minutes.

IMG_9387

Next, I drained and mashed the potatoes.

IMG_9388

I then drained the cabbage and spinach, added it to the mashed potatoes, seasoned them with the salt and pepper, and melted the butter into the mixture over medium heat.

IMG_9389

I put the whole mixture in a “well-buttered mould” (aka a 9×9 cake pan) and baked it at 350 degrees for 30 minutes.

IMG_9390

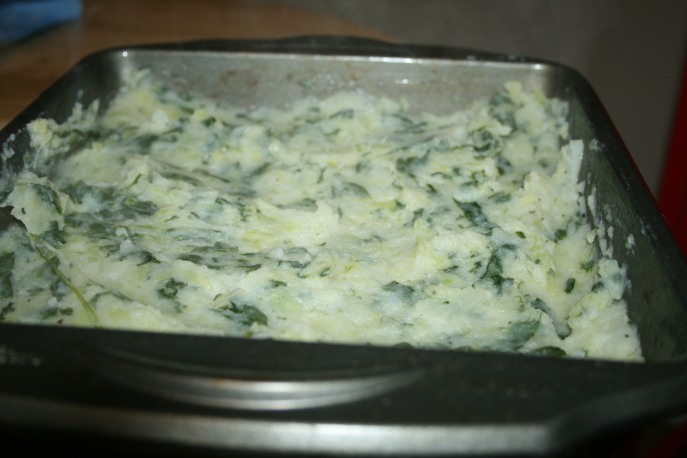
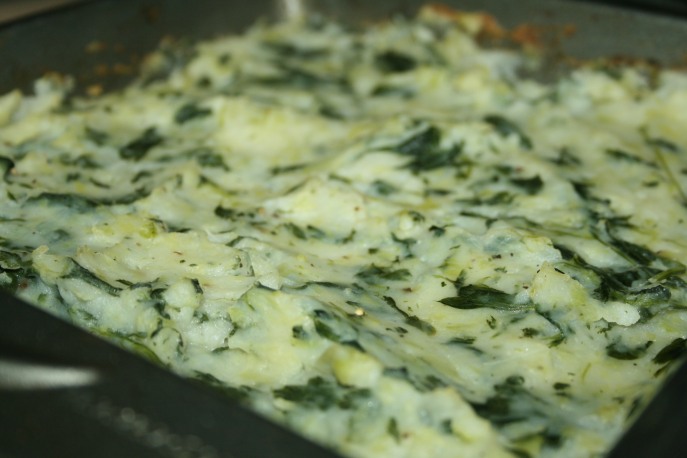
The colcannon came out of the oven smelling rich and savory. I couldn’t “turn it out” of the pan though, so I just had to scoop it out!

IMG_9391

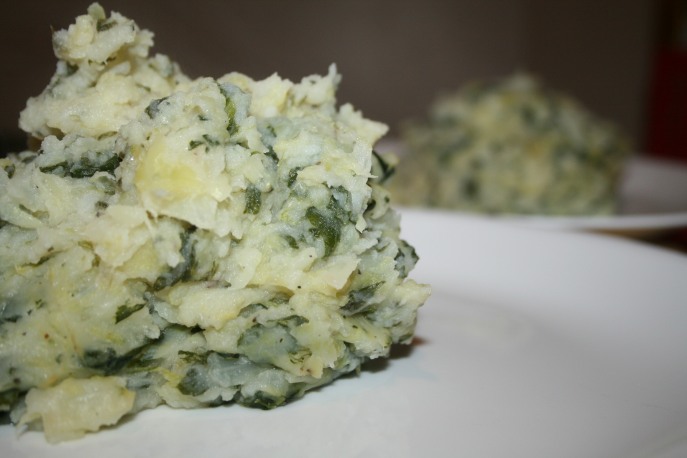
The scooped colcannon looked and tasted so delicious! This was such a satisfying dish to make!

Colcannon turned out to be a savory and filling dish. I enjoyed the entire process of making this recipe because it reminded me of when my grandmother would make boiled cabbage for me as a child (which I know sounds unappealing to many of you, but I always liked it!). Colcannon could be a standalone dinner, or it could be a filling side, depending on how much of it you would like to make and what ingredients you would like to add (modern recipes call for onions and bacon in addition to those here). Whatever you decide to do with it, it’s definitely worth a try!


Historic Everyday Eats – Fancy Biscuits

Standard

This week in Historic Everyday Eats, I decided to get a little “fancy.” That is, I made Fancy Biscuits. I took the recipe from an 1831 book titled A New Collection of Genuine Receipts(That is my shortened name for it. If you want to see the full title in all its ridiculously long glory, look no further!)

Genuine Receipts 1831

After taking a look at all of the “curious arts and interesting experiments” in this cookbook, I decided to go with a dessert, of course. “To make fancy biscuits,” one must:

Fancy Biscuits

“Take one pound of almonds, one pound of sugar, and some orange flower water. Pound the almonds very fine, and sprinkle them with orange flower water; when they are perfectly smooth to the touch, put them in a small pan, with flour sifted through a silk sieve; put the pan on a slow fire, and dry the paste till it does not stick to the fingers; move it well from the bottom to prevent its burning; then take it off, and roll it into small round fillets, to make knots, rings, &c. and cut into various shapes; make an iceing (sic) of different colours, dip one side of them in it, and set them in it, and set them on wire gratings to drain. They may be varied by strewing over them colored pistachios, or colored almonds, according to fancy.”

Despite the long description, this is actually a pretty simple recipe…if you can tweak it just right to make it work. 😉 Let’s see how mine turned out!

IMG_9344

The ingredients (cut in half from the original recipe so as to not have a ton of fancy biscuits sitting around): 8 ounces (1 cup) of ground almonds, 1 3/4 cups of sugar, 1/4 cup of orange blossom water, and 1 2/3 cups of flour. (Not pictured: additional water to make the biscuits come together as well as milk, butter, powdered sugar, and vanilla extract for the “iceing” that the recipe did not explain!)

IMG_9345

My first step was to grind the sliced almonds I got for this recipe. I used the food processor to make this easier on me!

IMG_9346

I then added the sugar and orange blossom water to the mixture! (I had to guess and progressively add more orange blossom water to the recipe as I went along in order to make it come together. I ended up with 1/4 cup total.)

IMG_9347

I mixed the sugar, orange blossom water, and almonds together into a “paste” (or as close to a paste as I could get it).

IMG_9348

I then moved the mixture to a pan over medium heat and added 1 2/3 cups of flour, which is half a pound, equal to the weight measurements for the sugar and almonds.

IMG_9349

To make this mixture actually come together without adding anymore overpowering flavor (like orange blossom water), I ended up adding 1/4 cup of water to the pan. This resulted in a more cohesive dough after about five minutes of stirring over medium heat.

IMG_9350

After the dough came together, I let it cool for about fifteen minutes, then I rolled it into 2 inch balls. (I didn’t have the patience to make intricate shapes!) I set them on a wire rack to prepare them for icing!

IMG_9352

Since this recipe gave no instructions for the icing, I found a modern recipe for a sugar glaze that you can find here. I heated 1/2 stick of butter over medium heat, added 1 cup of powdered sugar and 1/2 teaspoon of vanilla extract, and then loosened it up with 1 1/2 teaspoons of whole milk. I then poured the glaze over my biscuits, and I thus made them “fancy.” 😉 I let the biscuits and glaze harden for about 15 minutes before eating!

My fancy biscuits turned out to be very tasty! They are very, very rich and nutty in flavor. The orange blossom water adds a fresh taste to these “biscuits,” and the sugar glaze on top adds a nice presentation as well as sweetness to the dessert. These fancy biscuits would be a great finger food for a party, as long as no one is allergic to nuts!